
I’m back once again with another dumb DIY project. After my previous foray into making dumb shit to skate on my drive, I had a bit of a break from it. For a while I thought the dream of having my own random crap that I can wheel out and skate on my drive was nothing but a dream. But then, I saw the Keen Ramps Slappy Stick and knew I had to have one.
The problem is… I’m a massive cheapskate. Slappy Sticks go for $300 on the Keen Ramps website, and I quite simply am not willing to pay that (as well as postage to the UK). It turns out, however, that I have a bunch of tools, and materials for a slappy stick can be bought for just a third of the cost Keen Ramps are charging. Sure, you don’t get the Keen Ramps seal of quality, but you get the fun of building & skating your own stuff.
Here, check it out:
The Build
Let me preface this bit with a caveat: I am not a professional. The carpenters and professional ramp builders reading this are likely to cringe from how shit I am at this stuff. However, I’m pretty pleased with what I built, and I think it seems pretty rad.
The dimensions for my slappy stick are:
- 2 feet wide
- 4 feet long
- Just over half a foot tall
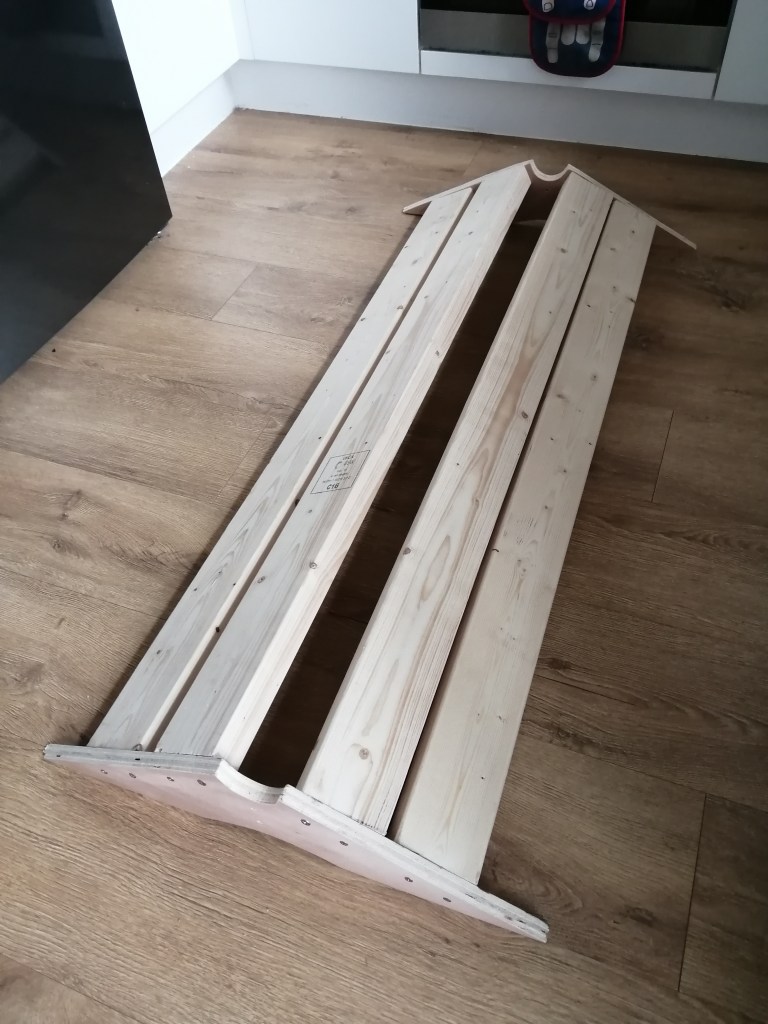
Using these dimensions, I got the profile for the support ends, which need to be triangular with a little hole cut in the top for the coping. I did a whole little blueprint diagram for it to figure out the sizing, and then used this to draw it up on a 2 ft x 0.5 ft piece of 18mm Plywood.
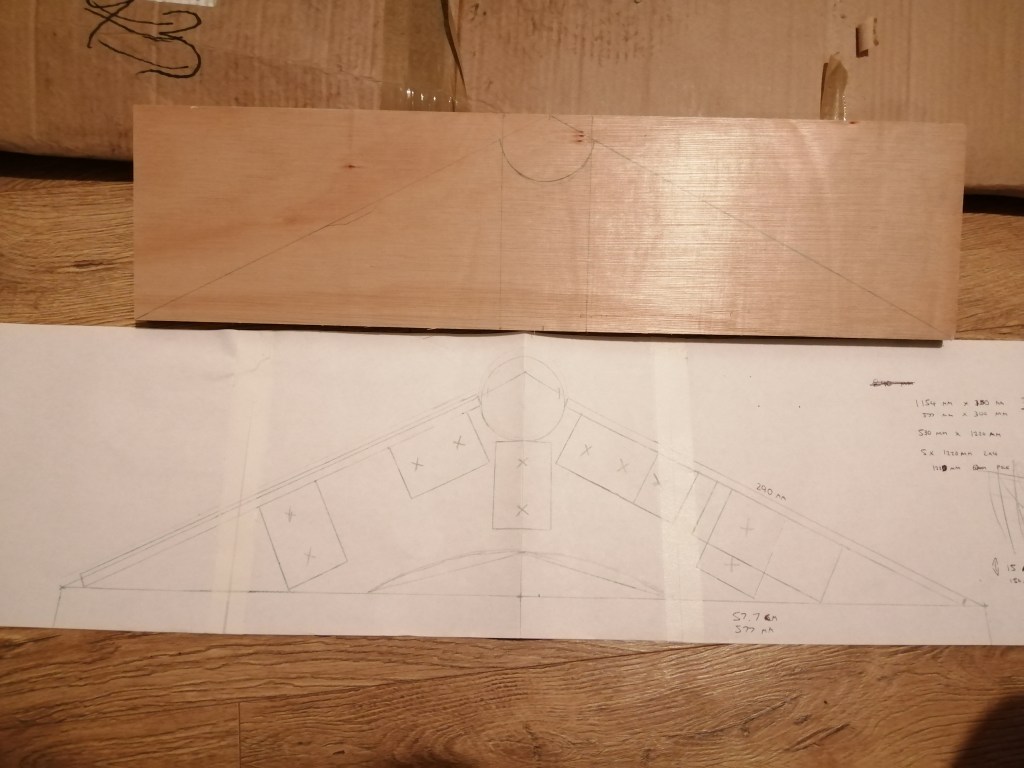
After this, I was able to cut out the first end piece. I did this using a jigsaw.
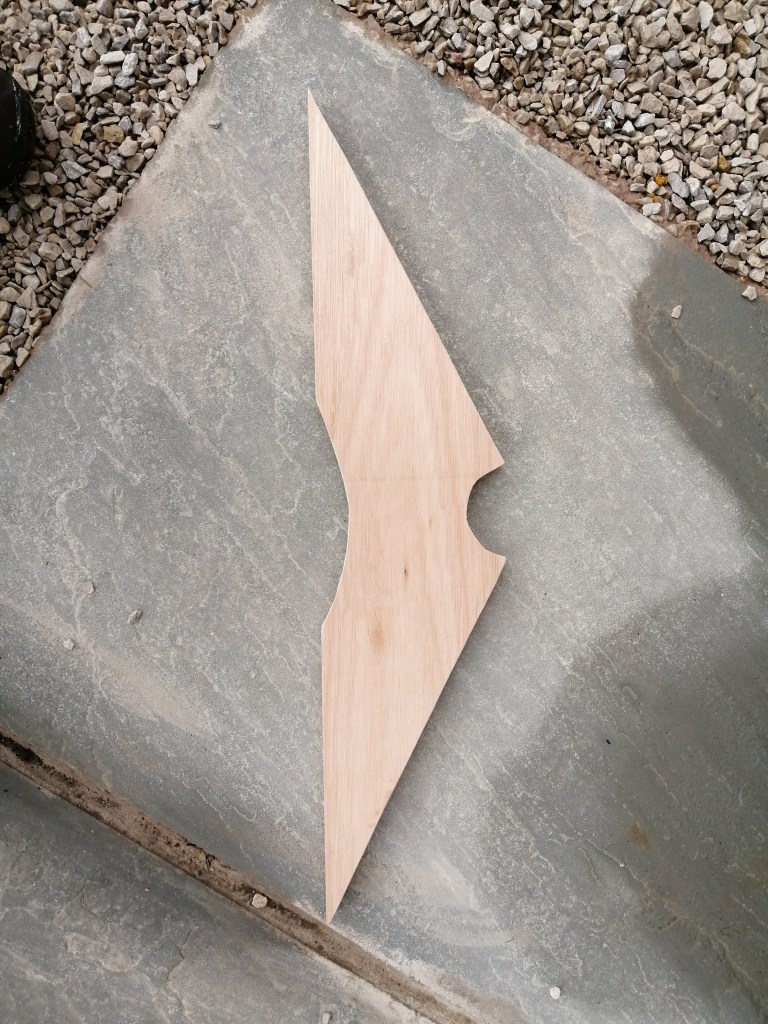
Then I used this piece as a guide to do the second end piece.
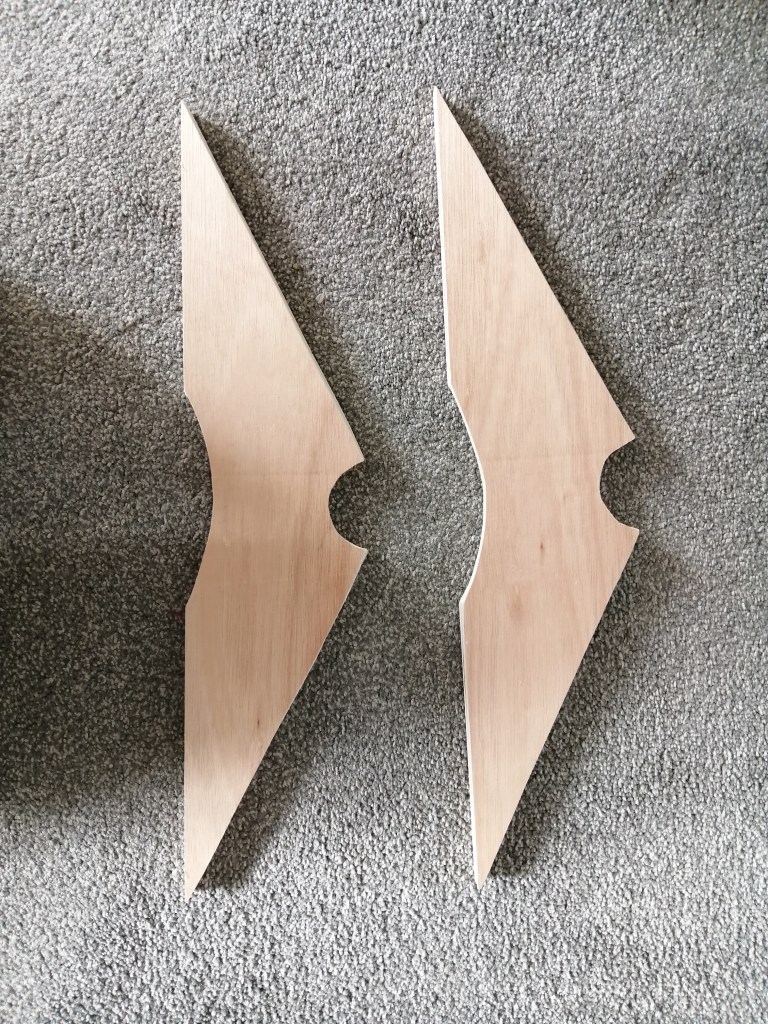
This part is perhaps the most fiddly, weird bit to get right. These two pieces hold up the structure of the whole thing, and they need to be as similar as you can get, because any differences is going to make one end of your slappy stick inconsistent. I don’t need to tell you this shit if you know what you are doing with carpentry. I probably don’t need to tell you even if you have no idea what you are doing. Basically: Make sure both of these pieces are the same size and dimensions.
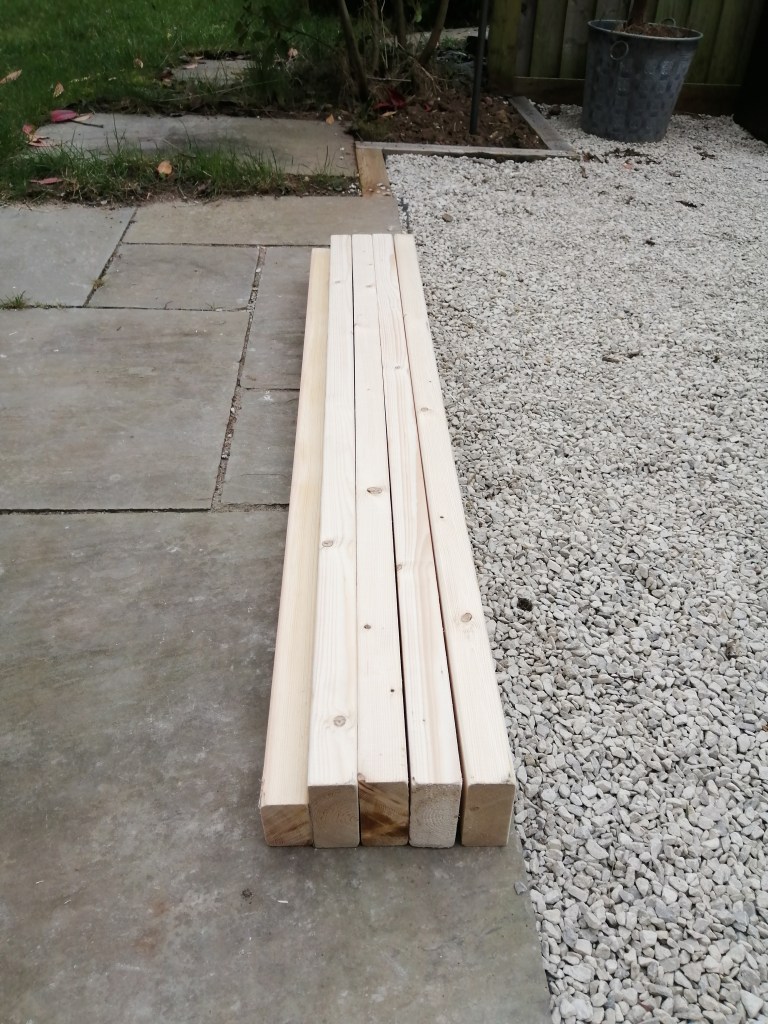
Next up I went and cut a bunch of timber beams. I needed 4 38mm x 89mm timbers, and a single 38mm x 63mm timber – all of these were 4 ft in length:
Now comes the fun part… Building stuff.
I think I did this the wrong way, but I started by building up the transitions. I’ve seen the Keen Ramps once has you do the coping guide timber (the thinner bit) first. This also might have made it easier to attach the coping, but you live you learn. Maybe next time I’ll be smarter with it.
I used some strong decking screws to attach the timbers, and at this point the whole thing goes from “a bunch of bits of wood” to “oh that looks like something I might be able to skate”.
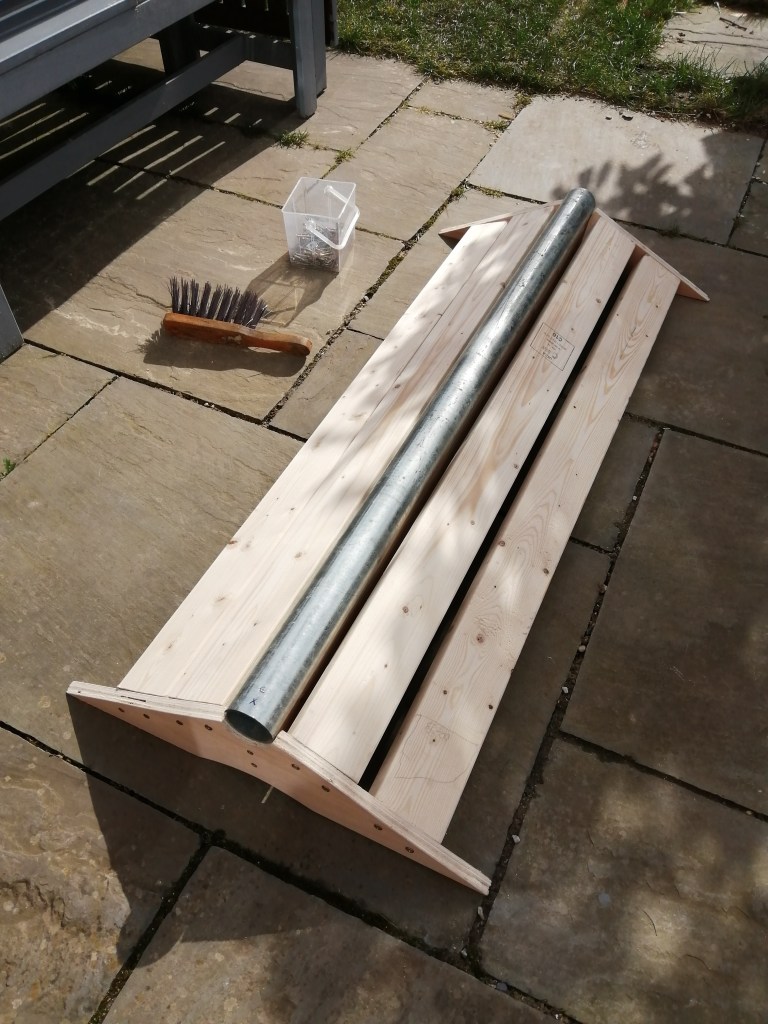
Next I did the guide timber across the middle. All of these timbers need to be super flush with the 18 mm plywood, as these timbers will be what you attach the top ply to. With the bank bits, this is easy, but the coping guide can be hard to line up nice and straight.
The coping is a bit of a pain in the arse. I ordered a 4ft bit of 63mm metal piping from The Metal Store, and then used some cobalt drill bits to drill a hole in the bottom side. I then used some small screws to attach them to the guide timber through the ends of the pipe, utilising pliers and a fucking skate tool screwdriver to tighten them up. This was horribly fiddly and I kind of regret how I did it. I should have waited for my corner drill bit attachment to arrive, but I was impatient. Listen, I was really excited to skate this.
The reason I did it this way was to ensure the coping doesn’t roll around when you’re on it. There are other methods I’ve seen ramp builders use to fix this – the most common is you drill a hole in the top of the coping so you can fit a screwdriver or drill into to tighten it. The problem with this method is that if you wanna grind off the edge (which for this thing, we do), then you risk getting your kingpin or truck stuck in the hole. Attaching the screws from the coping in the fiddly way I did it eliminates this.
So, we got a frame, we got coping on it, there’s only one (very exciting) thing left to do. Top ply.
I had 2 pieces of 6mm plywood – dimensions are 1ft x 4ft each. I screwed these into the frame timbers… And I was done!

And there we have it. A slappy stick. Go make one yourself. Go on. You do it. I dare you.

looks fun! Thanks for posting this! Great job.
LikeLike